
Talking About Evde Esrar Yetiştirme and How Yeşil Oda Makes It Easier
Read Time:6 Minute, 38 Second
people are curious about growing cannabis at home. Some just want to see if they can do it, others want to understand the process better. Either way, Evde Esrar Yetiştirme is not as hard as it sounds. You just need the right setup, some patience, and a bit of care.
That is kind of what Yeşil Oda helps with. They have been doing this for years and have figured out how to make home growing simpler. Their approach feels calm and practical, not rushed or confusing. So if you are just starting out, this might help you get things right the first time.
Why People Grow Cannabis at Home
Some do it because they like having control over what goes into their plants. Others do it because it feels good to see something grow from nothing. With Evde Esrar Yetiştirme, you can choose your soil, your light, even how much attention you want to give. There is no middleman. It is all you.
And once you see your first plant start to stretch and form buds, it just feels rewarding. You learn a lot by doing it too. It teaches patience. It slows you down a bit in a good way.
Yeşil Oda gets that. They are not trying to make it sound like science. Their advice is straightforward, written by people who have actually done it. Whether you are growing in a spare room or a small balcony, they help you figure out what will work best for you.
Step 1: Picking Your Growing Spot
The first thing to decide is where you are going to grow. Indoors or outdoors — both work fine, but they are different experiences.
Indoor Growing
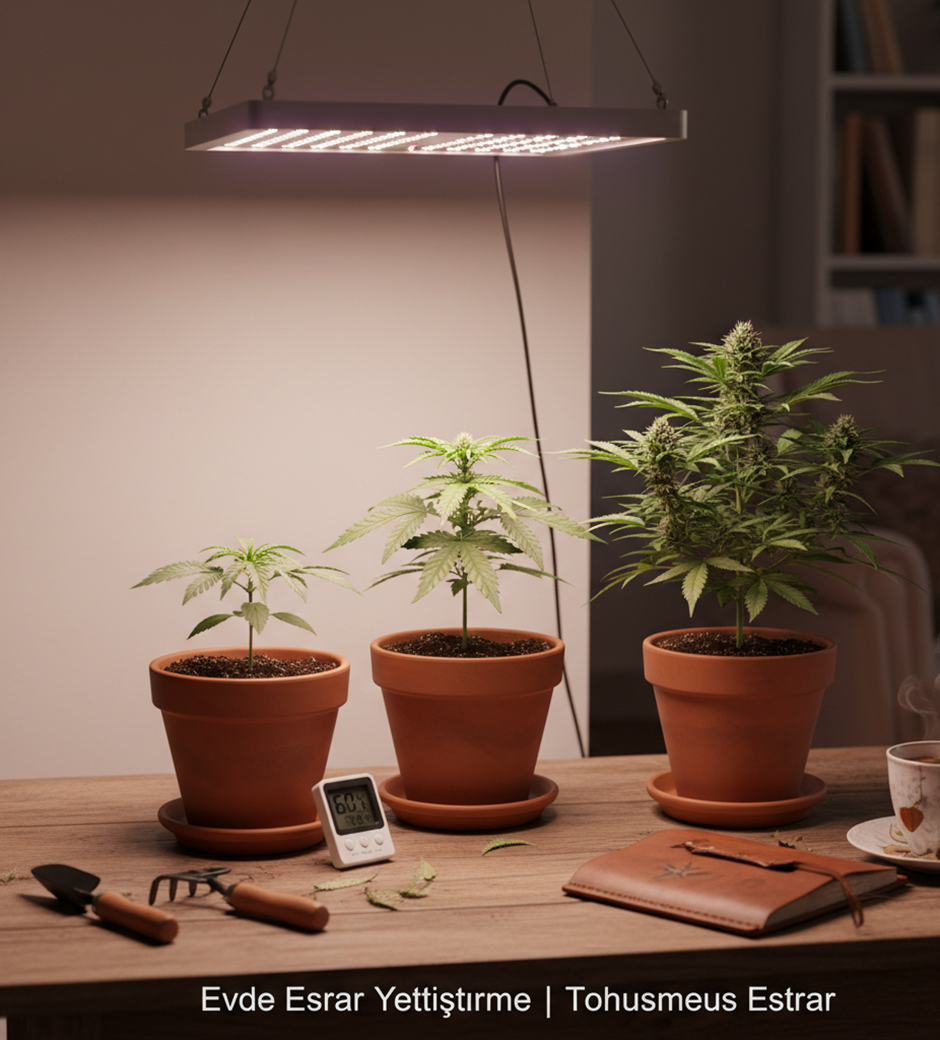
If you grow inside, you control almost everything: light, temperature, humidity. You can use a small tent, a corner, or even a closet. It is perfect if you live in a city or somewhere that gets cold or rainy a lot. Yeşil Oda has tips for building small setups that fit quietly into normal spaces.
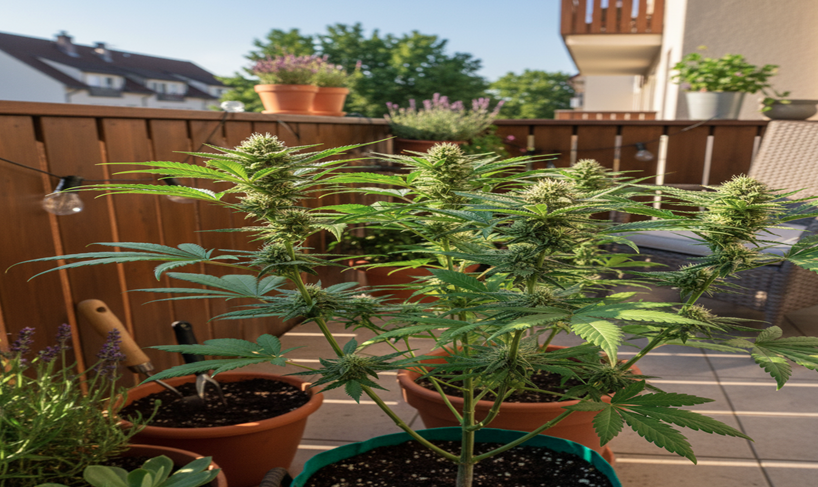
Outdoor Growing
Outdoors, the sun and air do most of the work. It feels more natural, but weather can mess with things. Heavy rain, cold nights, or too much humidity can slow the plants down. Still, if you have a private garden or balcony, it can be worth it. Yeşil Oda explains how to protect your plants and keep them healthy even when the weather changes.
Step 2: Choosing What to Grow
Choosing a strain is like choosing a pet — some are easy, others need more attention. If you are just starting, look for autoflowering strains. These plants know when to start flowering, so you do not have to change light cycles. They also stay smaller, which helps when space is tight.
Another good option is feminized strains. These only grow female plants, which are the ones that make buds. You do not waste time growing plants that will not give you what you want.
Yeşil Oda helps you pick strains that match your environment. They talk about things like smell, height, and flowering time — stuff that really matters once you start growing.
Step 3: Setting Up Your Space
Now comes the part that makes or breaks the grow. The setup. You do not need fancy gear, but you do need a stable environment.
Light
Light is life for cannabis. Indoors, LED grow lights are your best friend. They give your plants what they would normally get from the sun. Yeşil Oda recommends full-spectrum LEDs since they work for both growth and flowering.
During the growing stage, keep lights on for about 18 hours a day. Once the plants start flowering, switch to 12 hours of light and 12 hours of darkness. A timer helps with that.
Temperature and Humidity
Keep your grow room around 22 to 28 degrees during the day, and a few degrees cooler at night. Humidity should sit between 50 and 60 percent when the plants are still growing, and closer to 40 to 50 percent when they start flowering. Too much humidity can cause mold.
Yeşil Oda gives simple ways to track and adjust these things — like using small thermometers, fans, and dehumidifiers when needed.
Airflow
Plants need fresh air too. A small fan can make a big difference. It strengthens the stems and stops mold from forming. Just make sure the air moves around but does not hit the plants too hard.
Step 4: Watering and Feeding
People usually think plants need constant water, but with cannabis, less is often better. The top of the soil should feel dry before you water again. Overwatering can choke the roots.
Yeşil Oda suggests watering slowly until a bit comes out from the bottom of the pot. That way, you know the roots got enough.
Nutrients
Plants also need food. Cannabis loves nitrogen while it is growing and more phosphorus and potassium once it starts flowering. Yeşil Oda has a feeding chart that helps you figure out how much to give and when.
You will start to recognize when your plants are missing something — like yellow leaves for low nitrogen. That just comes with experience, and it is part of the fun of learning.
Step 5: Understanding the Growth Stages
Every plant goes through a few stages. Knowing what each one looks like helps you stay one step ahead.
- Seedling Stage: The plant is tiny and fragile. Keep the humidity high and the light soft.
- Vegetative Stage: This is when it grows tall and bushy. Lots of light, nutrients, and care go into this stage.
- Flowering Stage: Buds begin to form. The plant’s smell gets stronger. You will adjust the lighting and feeding here.
Yeşil Oda explains how to spot when one stage ends and the next begins. That way, you can tweak your setup without stressing the plant.
Step 6: Harvesting and Drying
Harvesting is where patience pays off. The buds are ready when most of the pistils turn amber or brown. You can also look at the tiny crystals on the buds — if they are cloudy instead of clear, it is time.
After cutting them, hang the branches upside down in a dark, cool space for about ten days. Then move them into jars to cure. Open the jars once a day for a couple of weeks to let out moisture. Yeşil Oda has an easy drying and curing guide that helps you keep your buds tasting fresh and smooth.
Step 7: Avoiding Common Mistakes
Everyone makes mistakes when they start. Maybe you overwater. Maybe your light is too close. It happens.
The key is to stay patient. Check your plants every day, notice the small changes, and adjust slowly. Yeşil Oda talks about these common issues all the time — like fixing drooping leaves, adjusting humidity, or spotting nutrient problems early.
Little changes make a big difference. You will get better each time you grow.
Why People Choose Yeşil Oda
People trust Yeşil Oda because their advice feels real. They are not trying to sell a dream. They just share what works.
Their experience shows in how they explain things. No pressure, no fake promises. They have tested everything they talk about, and it shows in the results. Whether you grow inside a small tent or out on a balcony, Yeşil Oda gives you the kind of help that actually matters — simple, honest, and grounded in experience.
Final Thoughts
Starting with Evde Esrar Yetiştirme might sound like a big task, but once you get into it, it becomes something peaceful. You learn as you go, and every mistake teaches you something new.
Yeşil Oda is there for people who want to do it the right way, without all the noise. Their guides, tools, and experience make the process feel natural and manageable.
If you are curious about growing, take a look at Yeşil Oda. You might be surprised at how much you can do with just a few plants and a bit of care.
Happy
0 %
Sad
0 %
Excited
0 %
Sleepy
0 %
Angry
0 %
Surprise
0 %

More Stories
North 5000 Explained: What It Means and Why It Matters
In today’s rapidly evolving consumer markets, product identifiers and branding terms often carry more meaning than they appear to at...
THC Vape Selection Guide: 8 Expert Tips to Choose the Right THC Vape Pen
Why Choosing the Right THC Vape MattersWhen people research a THC vape, they often focus only on appearance or price....
Why Using A Smart Toothbrush Is Beneficial (The Real Reasons People Feel A Difference)
A smart toothbrush is one of those upgrades that sounds minor until you live with it for a few weeks....
THC Vape Pen Effects: What to Expect and How to Manage Them
Whether you are a first-time user or an experienced cannabis consumer switching to a new format, understanding the effects of...
How to Choose the Right THC Edibles for Your Lifestyle
With so many cannabis products available today, choosing the right THC edibles for your lifestyle can feel overwhelming. Whether you're...
Kenevir Tohumu Satın Al: How to Choose Cannabis Seeds and Shop Amsterdam Seedbank
If you are searching Kenevir tohumu satın al, you are usually trying to do something practical. You want seeds that...
Average Rating